eDNA Extraction: Choosing DNA Extraction Techniques
Author: Jonah Ventures
Introduction
Choosing the right DNA extraction protocol for environmental DNA (eDNA) is critical, as it directly affects the quality and quantity of DNA obtained, which influences the accuracy of downstream processes such as PCR, sequencing, and species identification. Various protocols and commercial kits are designed to optimize DNA extraction for different applications. Despite these variations, all protocols typically involve some key steps.
Ultimately, selecting the right DNA extraction protocol may involve testing several methods on pilot samples to determine which produces the best results in terms of DNA quantity, quality, and cost-effectiveness for the project’s goals.

Major Steps of DNA Extraction
The main steps of DNA extraction generally include:
Lysis:
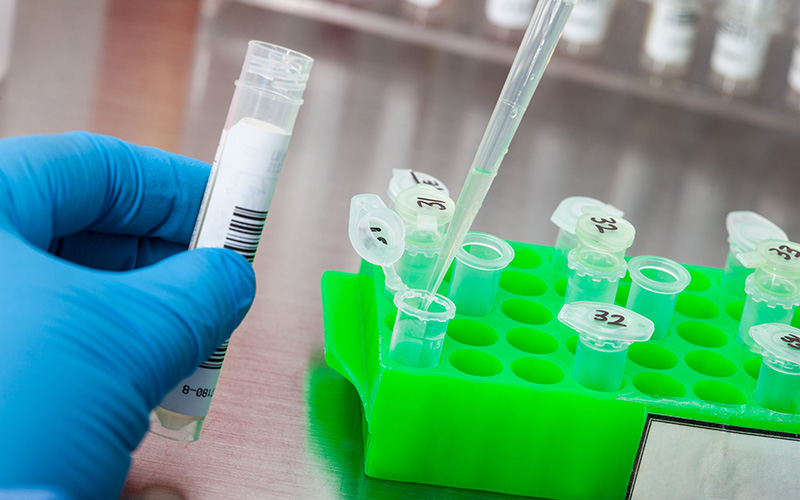
This step involves breaking open cells to release their contents, including DNA, into solution, creating what is known as a lysate. Different techniques can be used depending on the sample type, such as mechanical disruption (e.g., bead beating), enzymatic digestion (using enzymes to break down cell walls and membranes), or chemical lysis (using detergents and chaotropic agents to solubilize membranes and denature proteins). Lysis also helps release naked DNA that may be adsorbed onto surfaces. Not all organisms will lyse under the same conductions and the effectiveness of your lysis protocol impacts what eDNA is captured in your experiment.
DNA Binding:
Some DNA extractions may be based on precipitation of DNA, but commercial kits tend to use a DNA binding approach. Lysate is then processed to allow the DNA to bind to a specific medium for purification. This is typically achieved using silica columns or magnetic beads, where DNA selectively adheres to the medium under specific salt and pH conditions.
Washing:
Once the DNA is bound to the medium, impurities such as proteins, lipids, polysaccharides, and other contaminants are washed away using a series of washing buffers. This step is crucial for removing inhibitors that could interfere with downstream processes like qPCR or sequencing. Multiple washing steps are often used to ensure complete removal of contaminants.
Elution:
In this final step, the DNA is eluted from the binding medium using an elution buffer or water. This detaches the DNA from the medium, suspending it in solution for quantification, storage, or direct use in downstream applications. Elutions vary in both their total volume and concentration of DNA. The final amount a DNA eluted depends on a variety of factors including how much was present in the sample, and the efficiency of your DNA extraction method.
Quantification and Quality Assessment:
Although not part of the extraction process itself, quantifying and assessing the quality of the extracted DNA is usually performed before proceeding to PCR or sequencing. This can involve measuring DNA concentration and purity using spectrophotometry or fluorometry and assessing integrity via gel electrophoresis. In some cases, the extracted DNA can be immediately used for PCR without these assessments.
Considerations for Choosing a DNA Extraction Protocol
Although most DNA extraction protocols include the same basic steps, the execution of each step can vary significantly. For instance, some labs prefer phenol-chloroform extraction over column or bead-based methods. This traditional technique uses phenol and chloroform to chemically separate DNA from proteins and other cellular components. After mixing with the sample, centrifugation separates the mixture into layers, with the DNA remaining in the aqueous phase. While this method is known for producing highly pure DNA, it requires careful handling due to the toxicity of the chemicals involved.
On the other hand, there are many commercial kits that use silica columns or magnetic beads for extraction. These kits mainly differ in how they handle the lysis step, how DNA binds to the medium, and how impurities are washed away. The choice of extraction method depends on various factors, such as sample type, the desired DNA purity, and the downstream applications. Choosing the most suitable extraction method is critical for optimizing the quality and quantity of DNA for the specific requirements of the eDNA study.
Sample Type and Source
The origin and nature of the sample are critical factors when choosing a DNA extraction method. Environmental samples from water, soil, sediment, or air vary in complexity, and the matrix can greatly influence DNA extraction. For instance, soil and sediment samples often contain humic substances that inhibit PCR, so protocols with steps to remove these inhibitors are crucial. Large filters may require methods that efficiently concentrate and extract DNA from large lysate volumes while minimizing DNA loss. Some protocols call for centrifuging lysate or precipitating DNA with ethanol to concentrate it into a small pellet before extraction.
Extraction Efficiency and Sensitivity
The selected method must efficiently extract the small quantities of DNA typically found in eDNA samples. Sensitivity is vital, especially when detecting low-abundance target species or working in large environmental areas where DNA may be diluted. The protocol should maximize DNA recovery to improve species detectability. However, protocols that aggressively remove inhibitors may result in lower DNA yields or fragment the DNA into smaller pieces.
Cost, Speed, and Scalability
Cost, time, and scalability are practical considerations. High-throughput methods can save time and resources, especially in large-scale monitoring projects. Bead-based extraction kits that use 96-well plates are suitable for automation but require a significant initial investment. Tube-based extraction kits are more appropriate for small numbers of samples but are slower and do not scale as well. When contamination risk is critical, tube-based kits or additional levels of redundancy are preferred to detect and avoid cross-contamination, which is more likely to occur with 96-well plates.
Compatibility with Downstream Applications
The extracted DNA must be compatible with downstream applications such as PCR amplification, sequencing, or other analyses. DNA purity and integrity should meet the requirements for these processes. Protocols that yield high-quality DNA free from contaminants like proteins, polysaccharides, or other organic and inorganic materials are ideal.
Example Protocol: Extracting DNA from Soil Using Qiagen's DNeasy PowerSoil Pro Kit
1. Sample Acquisition
Collect approximately 0.25 g of soil on a sterile transfer item.
2. Lysis
Add the soil sample to the provided tubes, which contain ceramic beads for mechanical lysis. Next, add the appropriate volume of lysis buffer to the tube. Vortex the tubes vigorously or use a bead beater to homogenize the sample for approximately 10 minutes, ensuring thorough lysis of the cells in the soil and efficient release of the DNA.
3. Homogenization and Binding
Centrifuge the tubes briefly to remove any large particles. Carefully transfer the supernatant to a clean 2-mL collection tube. Add the commercial solution to the supernatant, mix thoroughly by vortexing, and incubate at room temperature for 5 minutes to help remove humic substances and other inhibitors. After incubation, centrifuge the tubes again and carefully transfer the supernatant to a new collection tube, taking care not to disturb the pellet at the bottom of the tube.
4. DNA Binding
Add the commercial binding buffer solution to the supernatant to promote the binding of DNA to the spin column. Apply the mixture to the spin column and centrifuge for 30-60 seconds. After centrifugation, discard the flow-through while keeping the spin column for the next step.
5. Washing
Add the first wash buffer to the spin column, centrifuge, and discard the flow-through. Then, repeat this step with the second wash buffer, ensuring the column is thoroughly washed to remove any remaining impurities. Discard the flow-through after each wash.
6. DNA Elution
Place the spin column in a clean 1.5-mL or 2-mL microcentrifuge tube. Add a specific volume of elution buffer or warm DNA-free water (typically 30-100 μL, depending on the desired DNA concentration) directly onto the membrane of the spin column. Allow the column to incubate at room temperature for 2–5 minutes, then centrifuge to elute the DNA into the collection tube. The eluted DNA is now ready for quantification, storage, or downstream analysis.
7. Storage
The eluted DNA can be stored at -20°C or -80°C for long-term storage.
Frequently Asked Questions
1. Do I need to extract DNA from water? Can’t I just run PCR on the water?
Yes, you generally need to extract DNA from the water before running PCR. Direct PCR on water samples is typically ineffective due to the presence of inhibitors that can interfere with amplification. DNA extraction concentrates the DNA and removes these inhibitors, ensuring a cleaner sample for successful PCR amplification.
2. How can you check to see if inhibitors have been removed?
To check if inhibitors have been removed, you can run a control PCR by adding a known quantity of template DNA to the sample. If no inhibitors are present, the template DNA should amplify successfully. However, if the control PCR fails to amplify, it indicates that inhibitors may still be present in the sample, potentially interfering with the PCR process.
3. Are negative controls used during extraction to detect cross-contamination?
Yes, negative controls are essential during the extraction process to detect any potential cross-contamination. These controls involve processing samples that contain no biological material (such as sterile water) through every step of extraction and amplification. If any DNA is detected in these controls, it indicates contamination, helping ensure the integrity of the actual samples.
4. What if DNA is found in negative controls?
If DNA is detected in negative controls, it suggests possible contamination during the extraction or PCR processes. Identifying the source of contamination is crucial, and it may be necessary to repeat the extraction and PCR to ensure reliable results. In some cases, small amounts of DNA may appear in negative controls and be amplified, but if this contamination does not affect the actual samples, it may have no significant impact on the study results. Nonetheless, addressing contamination is always important for maintaining confidence in the data.
5. Shouldn’t the lab always use the most efficient method for DNA extraction?
Although using the most efficient extraction method is ideal, labs must balance efficiency with factors such as cost, available equipment, safety, and the specific requirements of the study (e.g., type of eDNA and the sensitivity needed). Different projects may require different extraction methods, and the choice will depend on the unique demands of each study. Striking the right balance ensures both practical feasibility and reliable results.
6. How much does it cost to extract DNA?
The cost of DNA extraction can vary significantly based on the method, the number of samples, and the lab's location. While the materials for extracting an eDNA sample may only cost $5-$10, additional factors like labor, overhead, and equipment can substantially increase the overall cost. These hidden costs are important to consider when budgeting for a project, as they can make the true expenses much higher than the cost of materials alone.
7. Are there any special protocols used to prevent cross-contamination during extraction?
Yes, several protocols are used to prevent cross-contamination during DNA extraction, including:
- Using dedicated spaces and equipment for DNA extraction and PCR setup.
- Wearing disposable gloves and changing them frequently.
- Using barrier (filtered) pipette tips to prevent aerosol contamination.
- Routinely cleaning surfaces and equipment with DNA-degrading agents.
- Implementing strict workflows with unidirectional movement of samples from pre-PCR to post-PCR areas.
These measures help maintain the integrity of the samples and ensure accurate results.
Further reading
Eichmiller, J., Miller, L., & Sorensen, P., 2016. Optimizing techniques to capture and extract environmental DNA for detection and quantification of fish. Molecular Ecology Resources, 16. https://doi.org/10.1111/1755-0998.12421.
Hermans, S., Buckley, H., & Lear, G., 2018. Optimal extraction methods for the simultaneous analysis of DNA from diverse organisms and sample types. Molecular Ecology Resources, 18, pp. 557 - 569. https://doi.org/10.1111/1755-0998.12762.
Hinlo, R., Gleeson, D., Lintermans, M., & Furlan, E., 2017. Methods to maximise recovery of environmental DNA from water samples. PLoS ONE, 12. https://doi.org/10.1371/journal.pone.0179251.
Kuhn, R., Böllmann, J., Krahl, K., Bryant, I., & Martienssen, M., 2017. Comparison of ten different DNA extraction procedures with respect to their suitability for environmental samples. Journal of microbiological methods, 143, pp. 78-86 . https://doi.org/10.1016/j.mimet.2017.10.007.


